If you have coins and tokens in your MetaMask wallet, you can transfer them to your Binance account if they are supported on the exchange.
As MetaMask is one of the most popular cryptocurrency wallets and used by many people, it is important to know how to use MetaMask and transfer crypto from MetaMask to exchanges.
In this tutorial, I’ll show you how to transfer crypto from MetaMask to Binance and use correct networks and deposit addresses.
If you don’t have a Binance account or MetaMask wallet yet, check out the tutorials below create your Binance account and/or MetaMask wallet before getting started.


To open your Binance account with a 20% fee discount, you can use the referral ID ”WRYOO8BZ” or simply click the button below:
How to transfer crypto from MetaMask to Binance
To transfer crypto from your MetaMask wallet to Binance account, first log in to your Binance account and click the ”Fiat and Spot” page under the wallet dropdown.
On the fiat and spot page, click the deposit button.

After clicking the deposit button, first select the coin that you want to transfer from your MetaMask wallet to your Binance account.
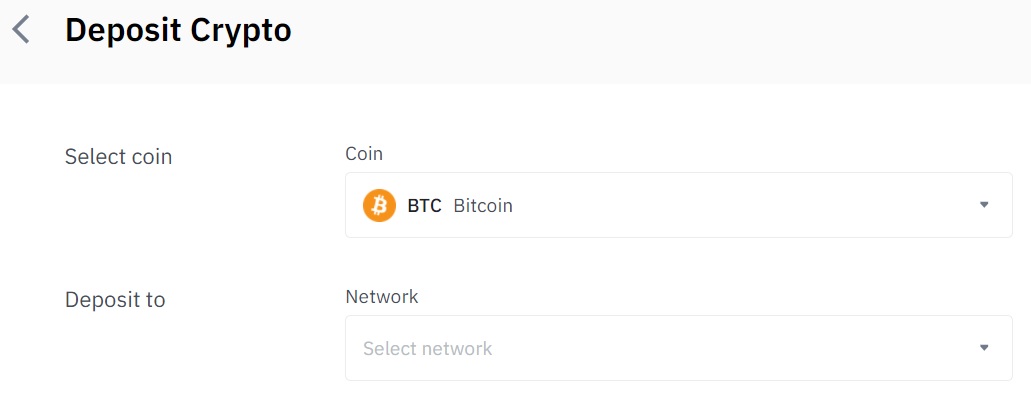
For example, if you have USDT in your MetaMask wallet and want to transfer it to your Binance account, you can select USDT.
![]()
After selecting the coin/token that you’ll transfer from your MetaMask wallet to Binance, now you can select the blockchain network.
If your crypto is on the Ethereum blockchain like ETH, ERC20 USDT, etc., you can select ETH (ERC20) as your deposit network.
If it is a BEP20 token such as BEP20 ETH, BEP20 USDT or BNB on Binance Smart Chain, you can select BSC (BEP20).
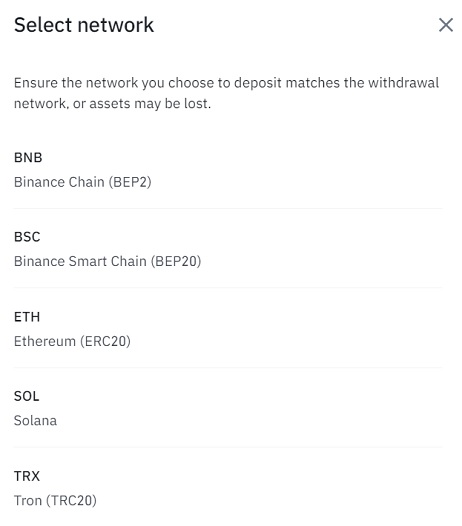
For example, USDT is also available on Solana and Tron networks.
But, if you transfer tokens from MetaMask to Binance, your tokens are obviously not on Solana or Tron as these networks cannot be added to and used with MetaMask.
But Ethereum-compatible networks such as Binance Smart Chain, Polygon and Avalanche can be added to and used with MetaMask.
So your tokens are likely to be on one of these Ethereum-compatible networks if not on the Ethereum blockchain.
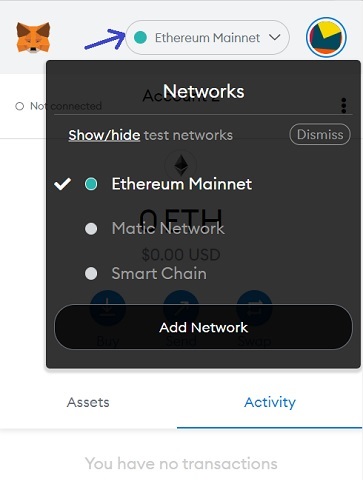
If you don’t know whether your crypto is on the Ethereum network or other networks such as BSC and Polygon, you can check which network you use on your MetaMask wallet.
Besides, you can search your MetaMask address on various blockchain explorers such as Etherscan, BscScan, Polygonscan and SnowTrace to check your tokens and learn which network they are on.
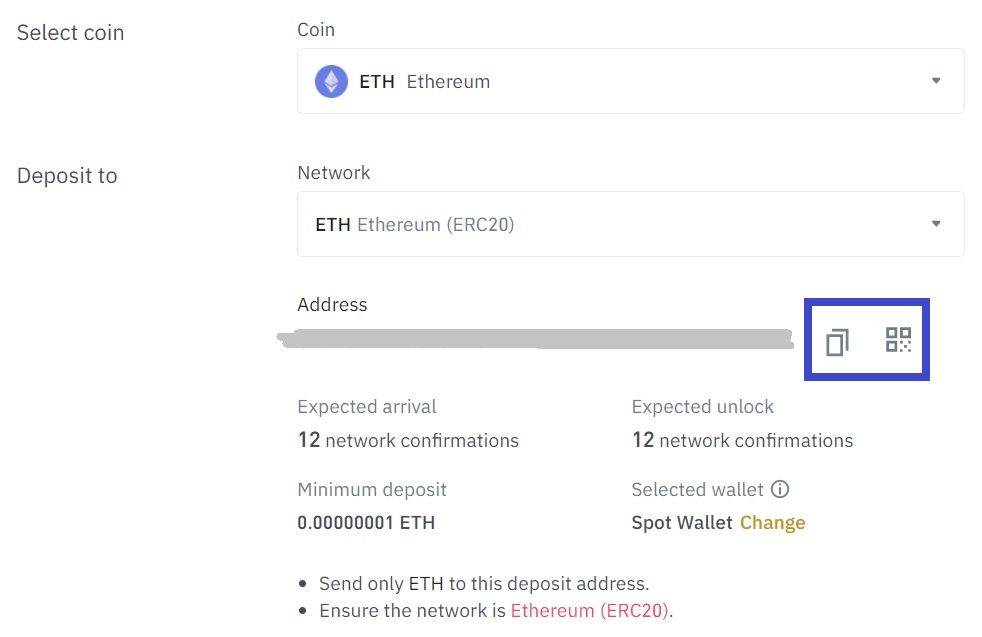
For example, to transfer your ETH (on the Ethereum network) from MetaMask to Binance, you can select Ethereum and the Ethereum network and then copy your deposit address.
After copying your deposit address on Binance, log in to your MetaMask wallet and click the send button in your wallet.
You should also switch to the correct network if you use any other network on MetaMask.
![]()
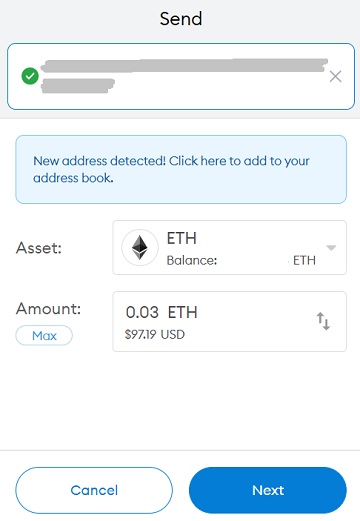
After clicking the send button, paste your Binance deposit address in the search address field.
![]()
After pasting your Binance deposit address, select the coin/token that you want to transfer to your Binance account and enter the amount.
And then click the next button to proceed to the next step.
Before confirming your transaction, check the gas fee for the transaction and the total amount (amount + gas fee).
If you want your transaction to be confirmed very fast, you can click ”edit” and select a higher gas fee or you can select a lower gas fee too.

If you want your transaction to be confirmed ASAP, select ”high”. If it does not matter much, you can leave it ”medium”.
If you want to pay a lower gas fee and don’t mind waiting for your transaction to be confirmed, you can select ”low” gas fee.
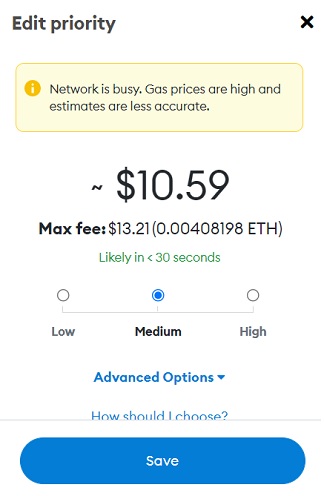
After editing your gas price, click the save button and then confirm the transaction by clicking the confirm button.
Once the required amount of network confirmations are met on the blockchain, you’ll see your crypto asset on your Binance account.
If you use Binance Smart Chain in your MetaMask wallet and want to transfer USDT (BEP20) to your Binance account, you can select the coin and the network like this:
![]()
So as long as you select the correct coin and the network when transferring crypto from MetaMask to Binance, you’ll be fine.
Also when you copy and paste your Binance deposit address, you should double check it and make sure it is correct.
Sometimes people send their crypto to a different address that they copied from somewhere else or a contract address of a token.
In that case, they need to recover coins sent to the wrong address, which is not always possible and usually troublesome.
The good thing about Binance is that when you deposit a token like USDT, even if you select the BSC network instead of Ethereum or vice versa, you’ll be fine.
Because the deposit address is same for both networks.
Also, you can’t send crypto, for example, to a Solana or Tron address from your MetaMask wallet as the address format is not compatible with that of Ethereum or Ethereum-compatible networks.
But you should still select the correct network and pay utmost attention to it as things might change anytime and you may not notice it.
To learn how to use and trade on Binance, check out our tutorials below:

If you have large amounts of crypto and want more security when using your MetaMask wallet, you can use it in conjunction with a hardware wallet like Ledger Nano X:


If you have any questions about transferring crypto from MetaMask to Binance, please leave a comment below.