MetaMask is one of the most popular Ethereum wallets for storing tokens and using decentralized applications.
You can use MetaMask to store Ethereum, ERC-20 tokens, ERC-721 tokens (crypto collectibles) and access dapps.
It is an easy-to-use and very useful Ethereum wallet. If you want to trade on decentralized exchanges or use DeFi apps, you especially need MetaMask.
In this tutorial, I’ll first show you how to set up MetaMask, and then you’ll learn how to use MetaMask, make transactions and use dapps with it.
How to set up MetaMask
MetaMask is available on web browsers, iOS and Android. You can install the MetaMask extension in Chrome, Firefox, Brave and Edge.
If you want to use decentralized exchanges and other dapps, you should install the browser extension.
In addition to MetaMask, there are also various mobile wallets such as Trust Wallet and Coinbase Wallet that you can use to access dapps on mobile.
But using dapps on mobile is a bit difficult and you should not expect a smooth experience. So browser extensions are the best option now.
Along with MetaMask, you can use a centralized exchange like Binance.
To open your Binance account with a 20% fee discount, you can enter the code ”WRYOO8BZ” in the referral ID field when opening your Binance account or click the button below:
I’ll show you how to install MetaMask in Chrome browser. You can follow the same steps to install it in other supported browsers.
Step 1: Add the MetaMask extension to Chrome
Visit Chrome Web Store and search MetaMask or click this link to add the extension to your browser. You can simply click on the ”add to Chrome” button.

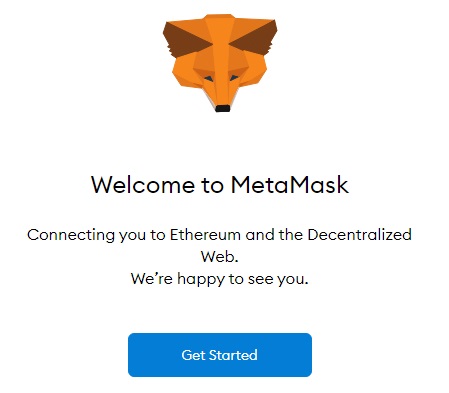
After you’ve added the MetaMask extension to your browser, click on the ”get started” button to start setting up your wallet.
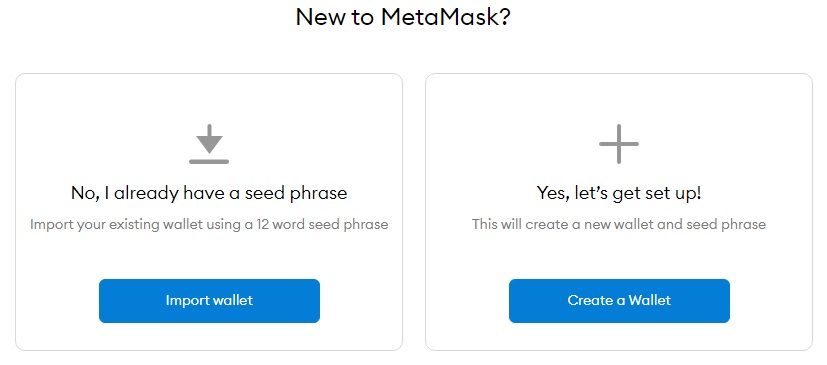
Step 2: Click on the ”create a wallet” button
To create your first MetaMask wallet, click on the ”create a wallet” button. If you have another wallet, you can import it into MetaMask too.
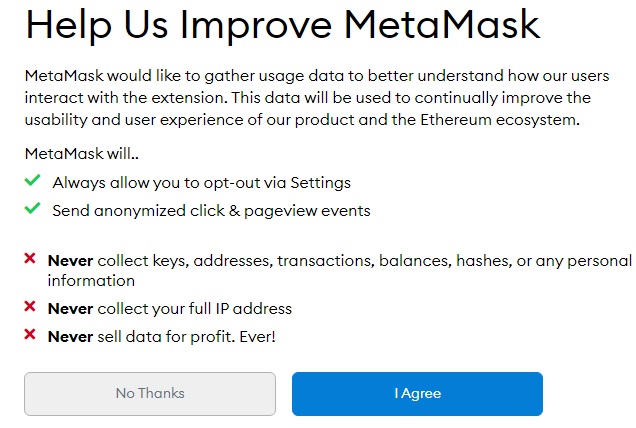
Step 3: Agree or disagree to anonymized data collection
MetaMask wants to collect some anonymized data to improve the wallet. You can agree to it or click on the ”no thanks” button depending on your preference.
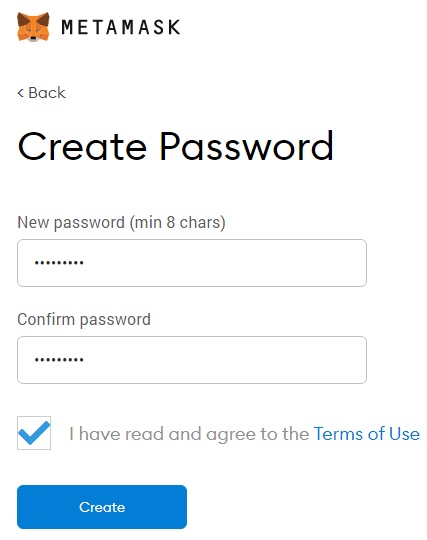
Step 4: Choose a password for your MetaMask wallet
In this step, you should choose a secure password for your MetaMask account. This is not your private key or seed phrase.
You will just use this password to log in to your MetaMask wallet. If you forget the password, you can import your wallet using the seed phrase that will be shown in the next step.
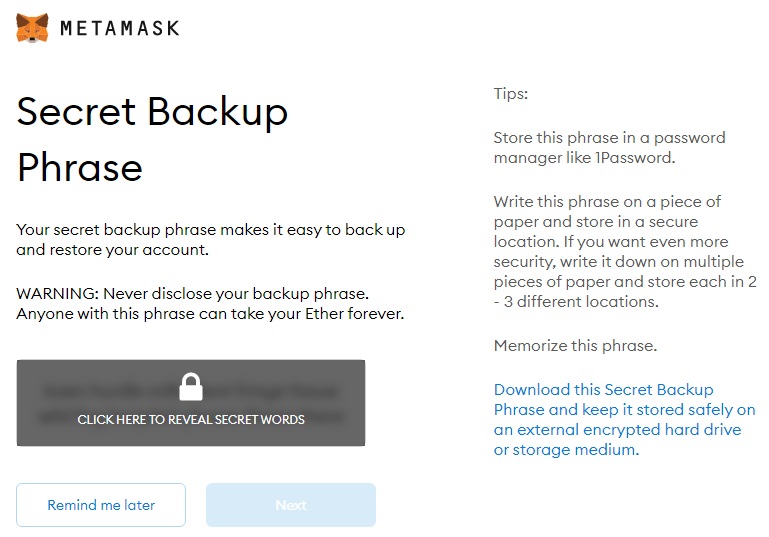
Step 5: Back up your seed phrase
Reveal your secret words (backup phrase) and write it down on a piece of paper. You can also store your backup phrase in a USB flash drive, preferably after encrypting it.
The security of your backup phrase must be of the utmost importance. Anyone who has access to your backup phrase can transfer your coins to different wallets.
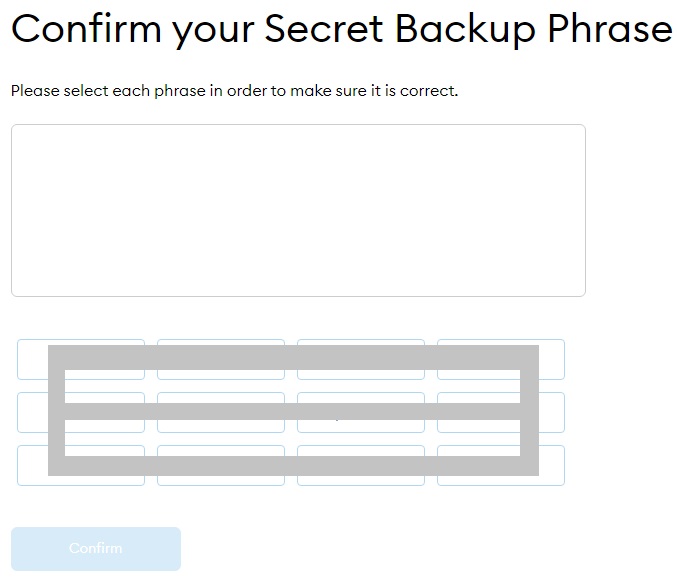
Step 6: Confirm your seed phrase
After revealing and saving your backup phrase, you need to enter it in order to confirm your backup phrase.
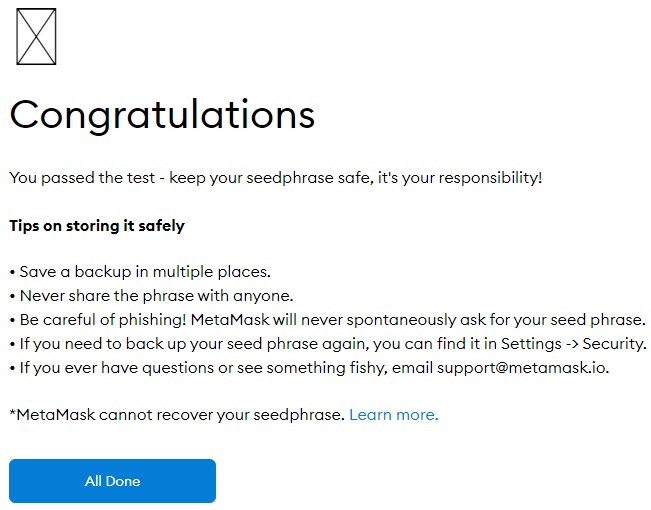
After confirming your backup phrase, you’re all done! Read the tips on safety and click on the ”all done” button start using your MetaMask wallet.
How to use MetaMask
MetaMask is a very easy-to-use cryptocurrency wallet that is used for storing Ethereum and Ethereum-based tokens.
But, if you are new to cryptocurrency wallets, it might still look a bit confusing which is quite normal.
I’ll show you everything you need to know about MetaMask so that you can use MetaMask without any issues.
Your Ethereum address on MetaMask
The first thing you should know is your Ethereum address. You can copy your Ethereum address by clicking on ”account details” as I show in the image below.
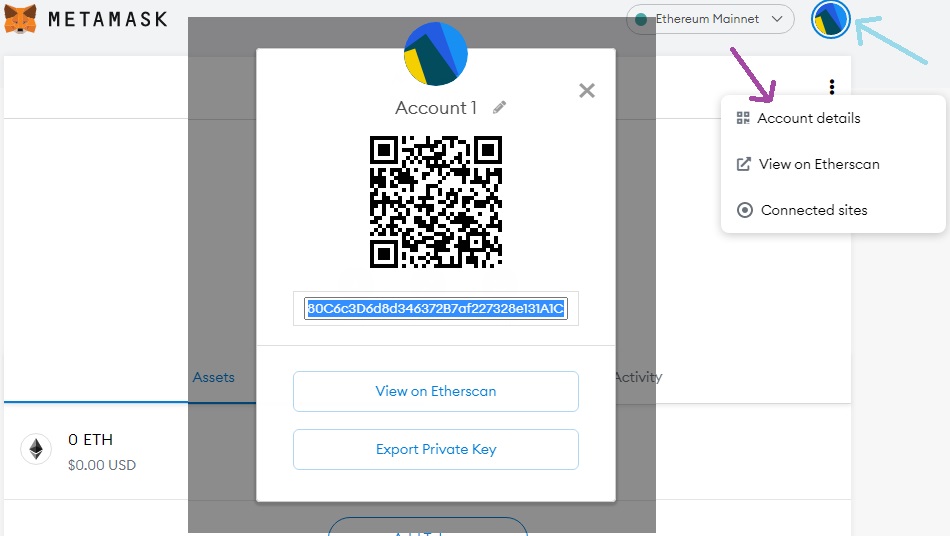
You can check your Ethereum address on Etherscan by entering your address, so you don’t need to always log in to your MetaMask wallet to check your tokens.
You can send Ethereum, ERC-20 tokens or ERC-721 collectibles to your address from exchanges you use like Binance and other wallets.
How to add tokens to MetaMask
When you send some ERC-20 or other types of Ethereum-based tokens to your MetaMask wallet, they may not show up on your wallet.
You should click on ”add tokens” and search your token. But you may still not find the token you’re looking for.
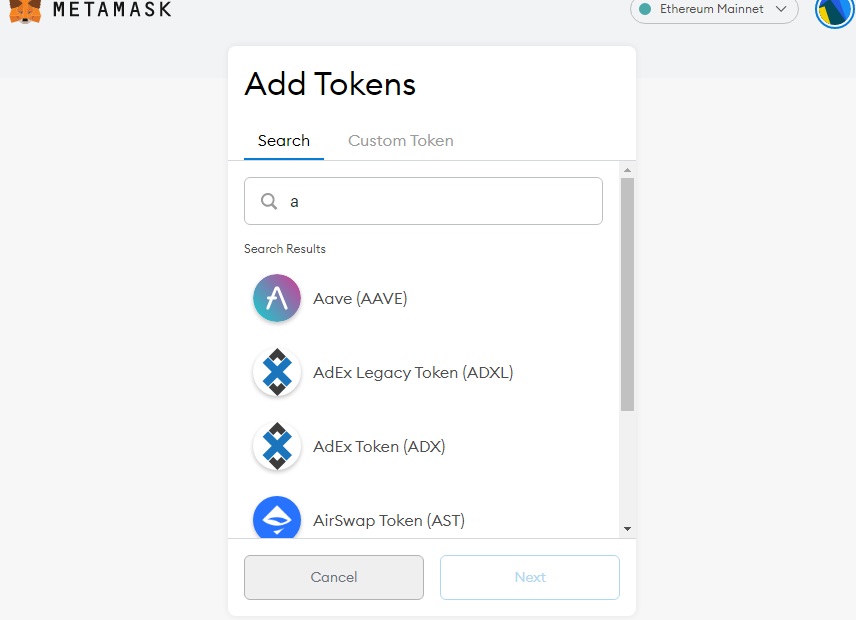
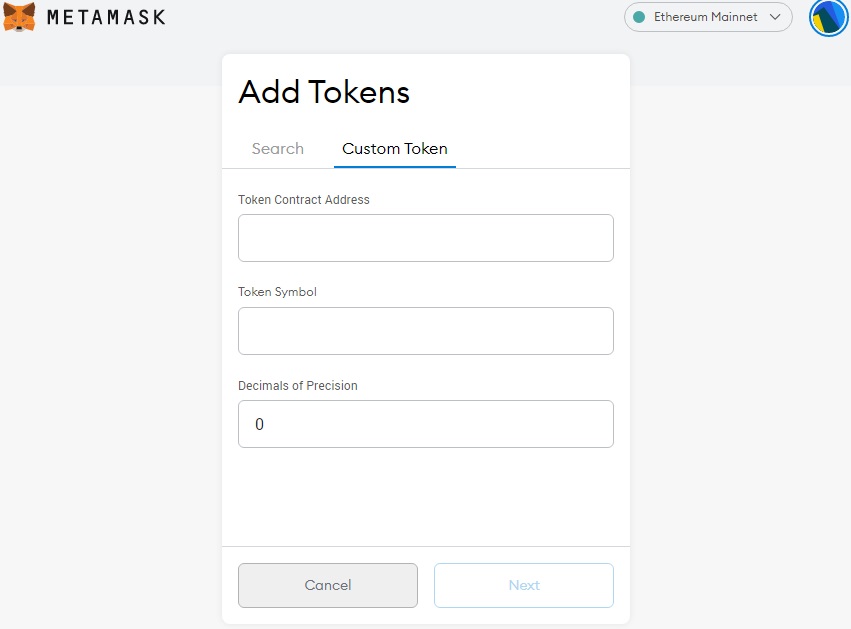
In that case, you should click on ”custom token” and add the token you’re looking for yourself by entering related information.
How to add a custom token to MetaMask
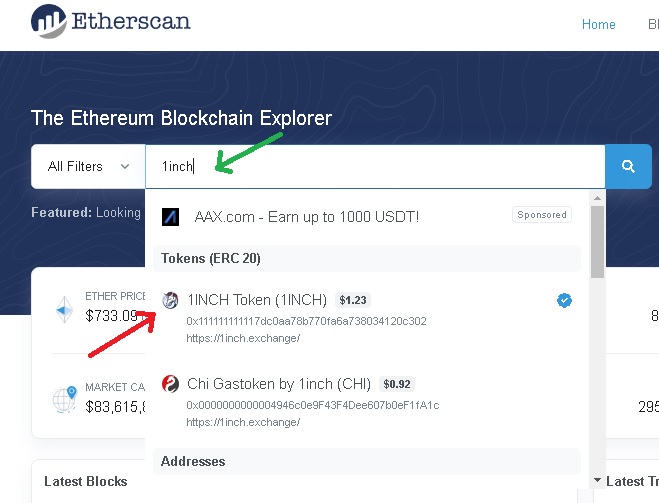
Let’s say you can’t see 1INCH token in your wallet. You first need to go to Etherscan and search the token you want to add.
In this example, we’ll search 1inch and get its contract address and other info. Make sure you click on the right (official) token.
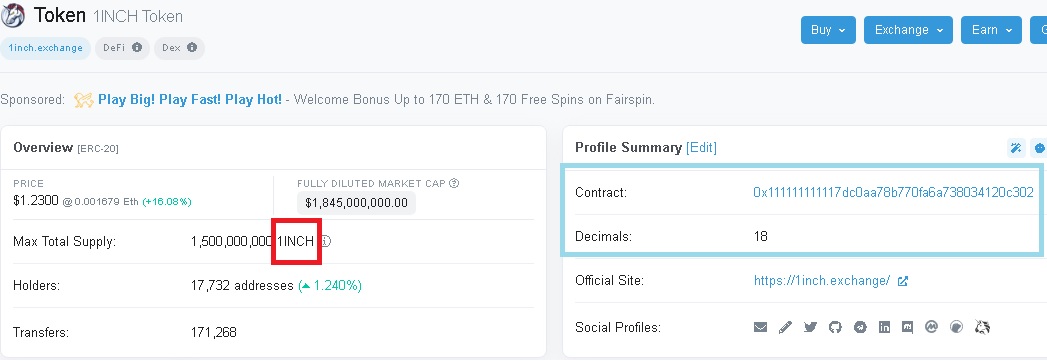
Copy the contract address, token symbol (1INCH) and decimals (18). You need only this information to add a token to MetaMask yourself.
Go back to your MetaMask wallet and enter the contract address of the token you want to add. You may not need to enter other info, MetaMask can recognize the token once you enter the contract address.
How to send tokens from MetaMask to exchanges
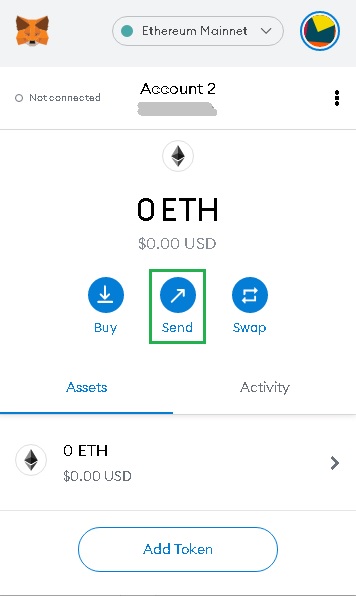
To send tokens from your MetaMask wallet to exchanges or other wallets, first click on ”send” on MetaMask.
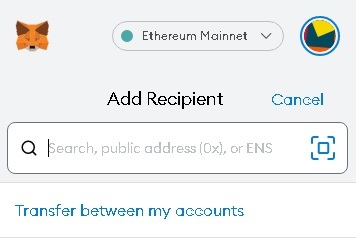
Enter your destination address in the ”add recipient” field.
Choose the asset you want to send, Ethereum, ERC-20 tokens, etc., and enter the amount.
MetaMask automatically adjusts the fee depending on the network and give you an option to make slow, average or fast transactions.
If you need your transaction to get confirmed asap, you can choose ”fast”. Or you can choose ”average” to pay lower transaction fees but it may take longer.
After that, you can click on the ”continue” button and then confirm the transaction.
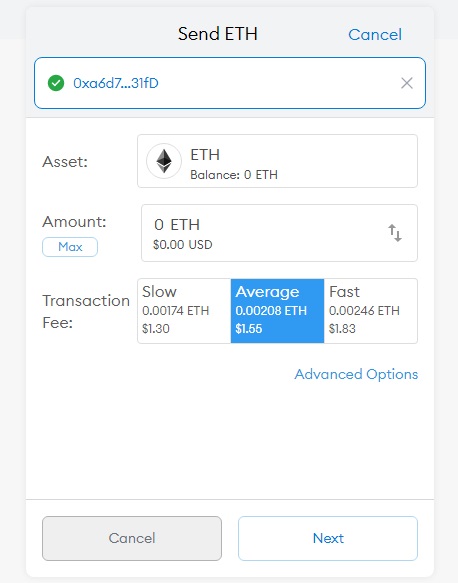
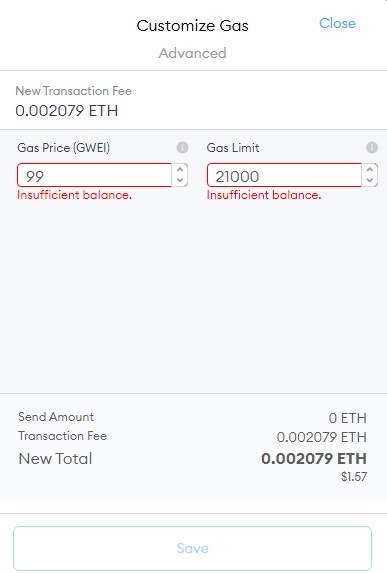
You can also click on ”advanced options” to customize gas price. You can get more information on current gas prices from ETH Gas Station.
How to connect MetaMask to Ledger
If you have a hardware wallet like Ledger Nano X or Trezor, you can connect it to MetaMask.
In this way, you can make transactions and use dapps with your hardware wallet safely.
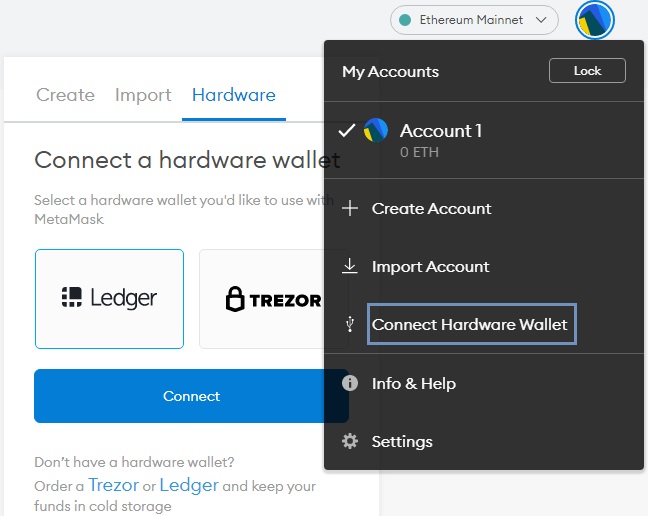
To connect Ledger Nano X to MetaMask, you can refer to our guide below:
How to import wallets into MetaMask
You can import other wallets into your MetaMask with your private key or JSON file. First click on ”import account” on MetaMask.
After that, you can paste your private key or choose your JSON file to import your wallet into MetaMask.
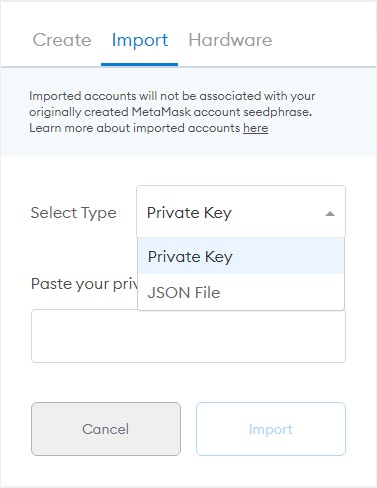
Imported wallets have nothing to do with your original backup phrase for your MetaMask wallet. If you recreate your MetaMask account using the backup phrase, imported wallets will not be there.
So you should never delete your private keys or JSON files after importing your wallets into MetaMask. Keep them in a safe place as you may still need them to access your tokens.
How to connect MetaMask to Uniswap? Connecting MetaMask to dapps
To connect your MetaMask wallet to Uniswap or other dapps, first log in to your MetaMask wallet on your browser.
After that, visit Uniswap and click on the ”connect to a wallet” button, and choose ”MetaMask” among the supported wallets.
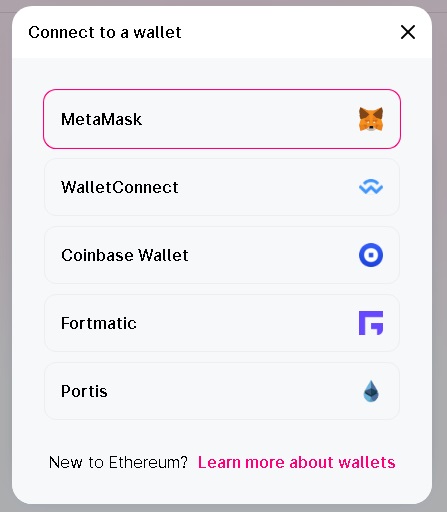
After you click on MetaMask, a MetaMask pop-up will appear. You need to choose the account that you want to connect to Uniswap and then click on the ”next” button.
Sometimes Uniswap may not detect your MetaMask wallet. In that case, you should refresh the page and make sure you’re logged in.
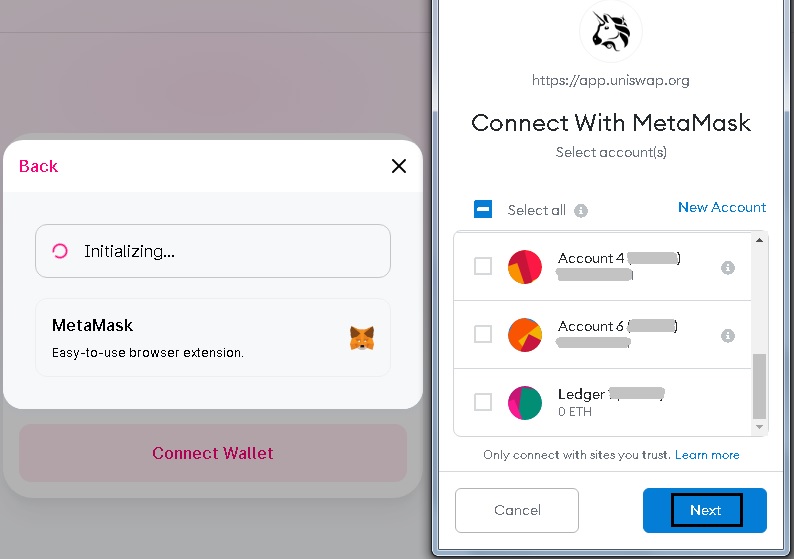
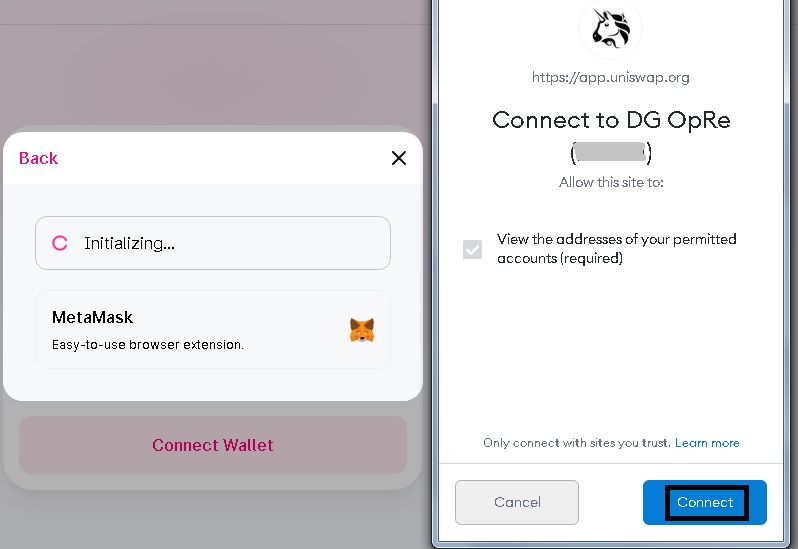
After choosing the address, click on the ”connect” button and you’re done. You can start using Uniswap.
When you make a transaction on Uniswap, you will again need to confirm it on your MetaMask wallet.
How to reveal MetaMask backup phrase? MetaMask settings
If you lose your MetaMask backup phrase, you can reveal it if you have still access to your MetaMask wallet.
To reveal the seed phrase, go to ”security & privacy” on the settings page and click ”reveal seed phrase”.
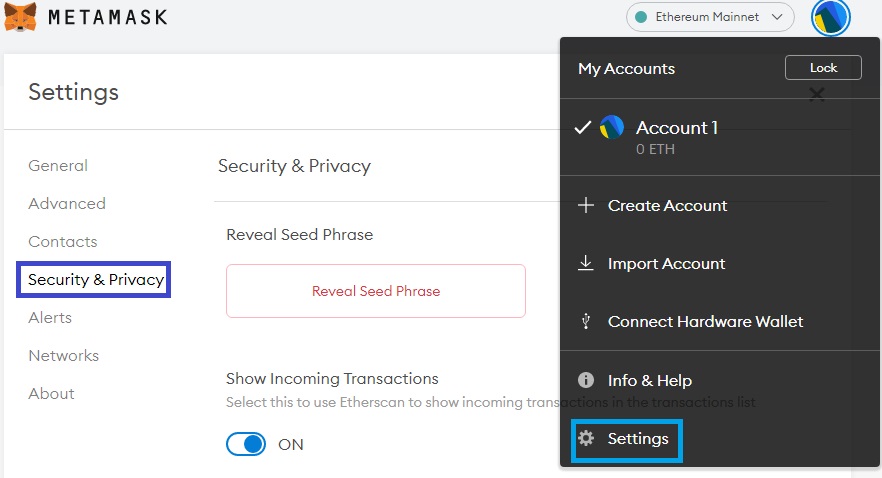
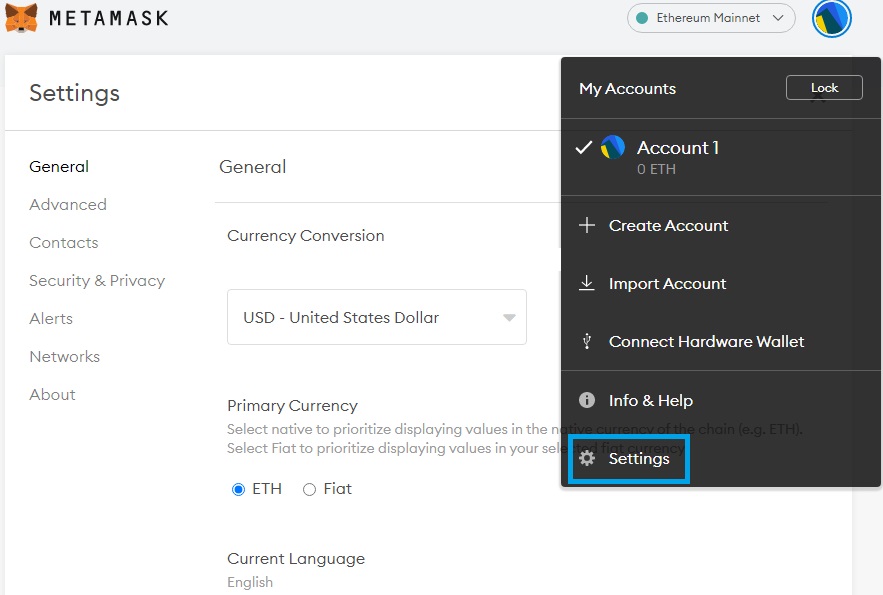
On the settings page, you can also change the currency from USD to other currencies and the language.
Is MetaMask safe?
Yes, MetaMask is a safe Ethereum wallet. You can use it on your browser or mobile devices without any issues.
But, if your computer is infected, nothing can help you. So you should first make sure that your computer is secure and free of any malwares.
A malware that specifically targets you or MetaMask in general can easily transfer your cryptocurrencies to the address controlled by attackers.
Because of that, you should be very cautious of things you download and install on your computer. Alternatively, you can get a hardware wallet like Ledger Nano X.
Hardware wallets are known as cold wallets which means that they are not connected to the internet unlike other types of cryptocurrency wallets.
Hardware wallets are still not the ultimate solution, but they can prevent attackers from accessing your private keys.
If you get a Ledger Nano X or Nano S, even an attacker that has physical access to your device can’t extract your private keys.
For other cryptocurrency wallets, check out the reviews below:

