TradeSanta is one of the most popular cryptocurrency trading bots in the market. In this review and tutorial, you will learn how to use TradeSanta, create Bitcoin and altcoin trading bots and use TradeSanta with Binance.
What is TradeSanta?
TradeSanta is a cryptocurrency trading bot that you can use with various cryptocurrency exchanges such as Binance and Huobi Global.
After you register on TradeSanta, you can create and use Bitcoin and altcoin trading bots based on different strategies with unlimited trading volume for 3 days.
If you trade cryptocurrencies on Binance, you can connect your Binance account to TradeSanta via your API keys and automate your cryptocurrency trades on Binance. After the 3-day free trial of the basic package, your trading limit will be updated to $3K/month. You can switch to a new plan to enjoy unlimited trading volume.
How to use TradeSanta? TradeSanta tutorial
First visit TradeSanta to create your account. Click on the ”sign up” button on the homepage and enter your user name, email and password to create your account.
After signing up, you will receive a confirmation email to verify your email address. After verifying your email address, you can start creating and using crypto trading bots on TradeSanta.
How to use TradeSanta with Binance? Setting up a Binance trading bot
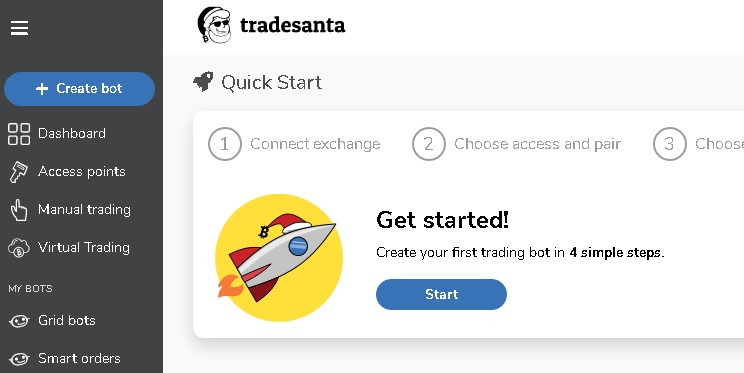
After signing in to your TradeSanta account, click on the ”create bot” button to create your first cryptocurrency trading bot. In this tutorial, I’ll show you how to connect Binance to TradeSanta and set up a cryptocurrency trading bot for Binance.
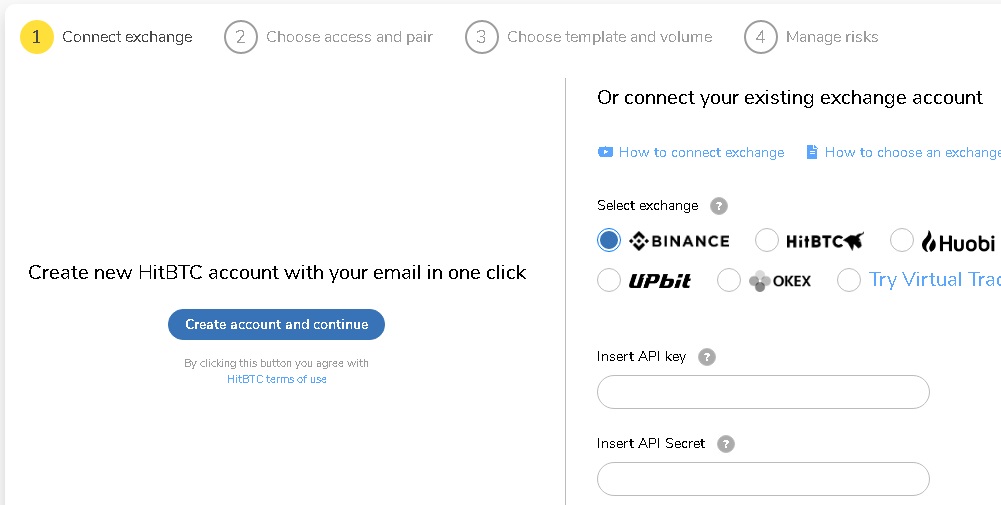
Step 1: Create API keys on Binance and connect your Binance account to TradeSanta
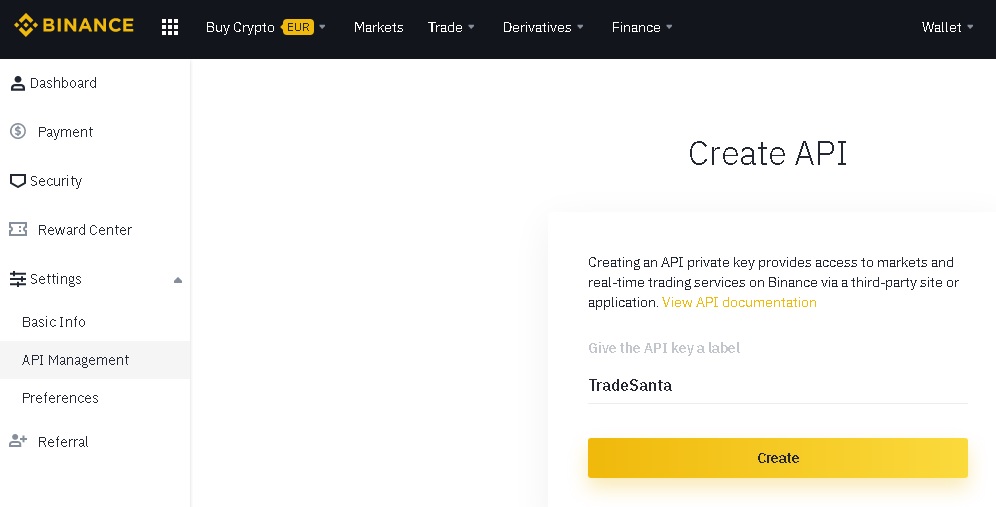
First log in to your Binance account to get your API keys. You can find your API keys by clicking on ”settings” and then ”API management” on your Binance dashboard.
Enter a label for the API key you will create such as ”TradeSanta” and click on the ”create” button.
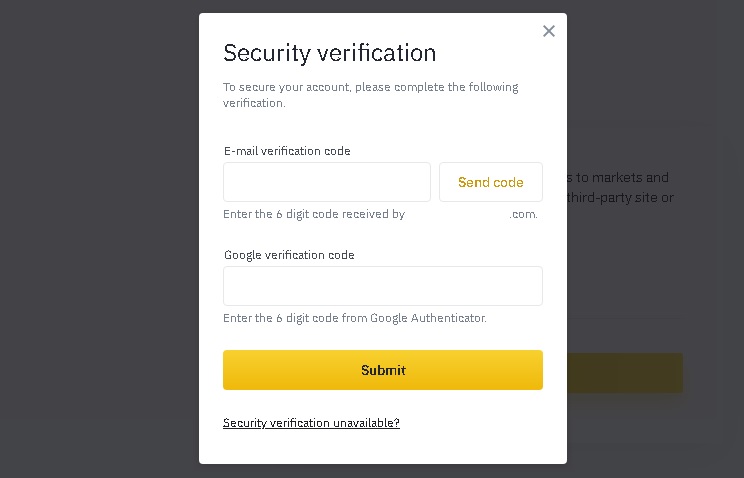
After you click on the ”create” button, you need to enter your email verification code and 2FA code to create your API keys. After that, you can view your API key and API secret key and enter them into your TradeSanta account.
For security reasons, Binance displays the API private key only once. Therefore, you need to store your API private key in a safe place not to lose your private key. If you lose your API private key, you need to set up a new API.
Step 2: Choose a strategy and a pair for your crypto trading bot
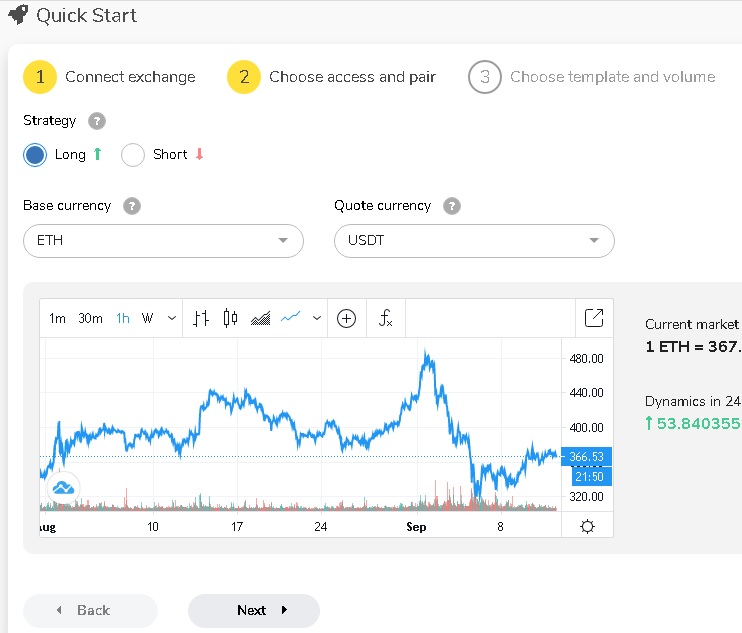
After connecting your Binance account to TradeSanta, you need to choose a strategy and a pair to set up your crypto trading bot.
If you think your base currency will rise against the quote currency, you need to go long. Otherwise, you need to set your strategy as ”short”. My pair in the example below is ETH/USDT, and as I think ETH will rise, I go long.
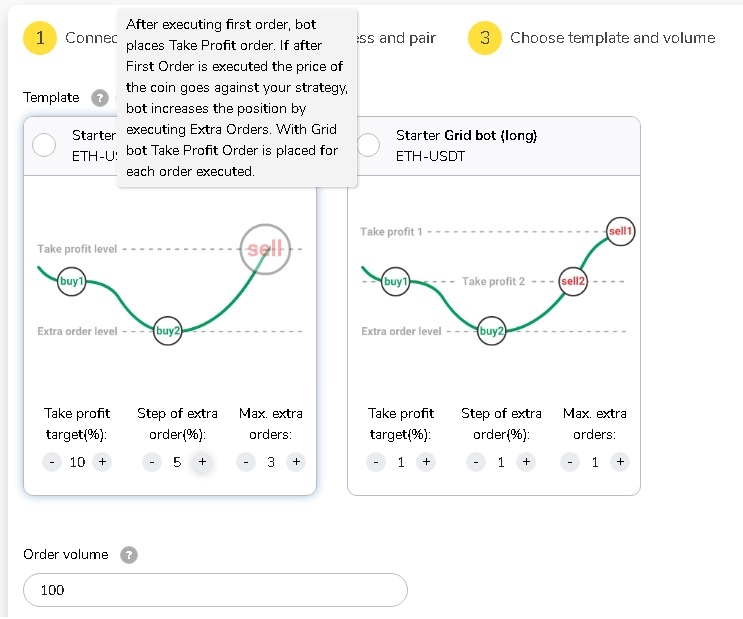
Step 3: Choose a template and volume for your crypto trading bot
I choose the DCA bot and set my take profit target as 10%. So, if ETH increases by 10%, a profit will be taken. If ETH price drops by 5%, the bot will increase my position by buying more ETH (extra orders). You can also set the maximum amount of extra orders.
As this is a crypto trading bot, you can instead set a much lower take profit target depending on the pair you choose. For the grid both, let’s says ETH declines by 5% and the bot increases our position with an extra order, now our 10% take profit target will be in effect not for the whole position but for each single order.
After entering your order volume, you can see the approximate amount of USDT required for your bot depending on your initial order volume and the number of extra orders you set for the bot.
Step 4: Set a stop loss and choose a signal for an optimal entry
In this last step, you can set a stop loss for your trading bot to minimize your losses in the event of undesired price movements. You can also choose a signal such as Bollinger Bands which will be used to find an optimal entry based on Bollinger bands of the pair for the past 100 minutes.
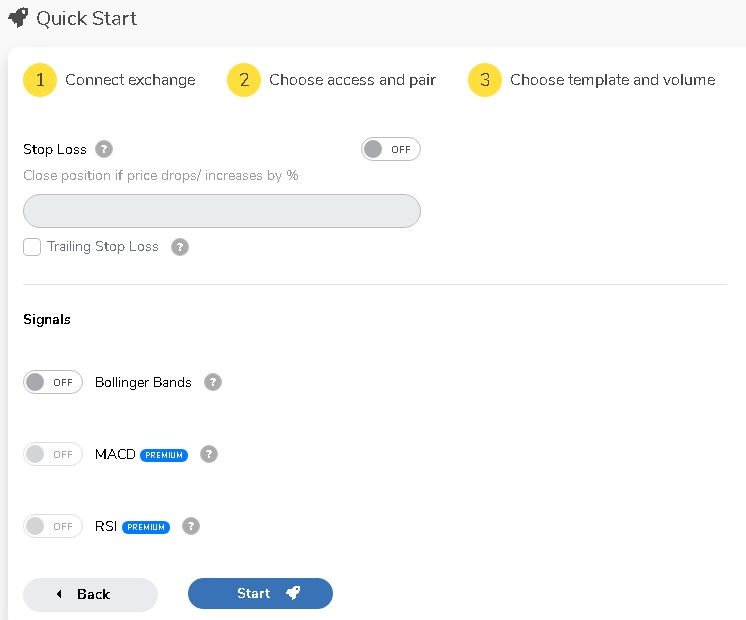
After setting a stop loss and choosing a signal or without doing this, you can start your Binance trading bot by clicking on the ”start” button. If you want to trade more than one trading pair, you can set up more bots for different trading pairs by following the same steps.
How to upgrade your TradeSanta plan?
After you register on TradeSanta, you can use the basic package for free for 3 days. After 3 days, your trading limit will be updated to $3000/month.
After the free trial ends, you can still continue using TradeSanta, but you can create maximum 2 bots and your trading volume is limited to $3000/month. To increase these limits, you can buy a paid plan on TradeSanta.
The basic plan which costs $20 monthly will allow you to use 49 bots at the same time without any trading limit. You can also get a good amount of discount by buying a plan for a longer duration.
To switch to a paid plan, first click on ”settings” on your TradeSanta profile and then click on ”top up” to deposit cryptocurrency into your account by specifying the amount in USD. After funding your account, click on ”settings” on your profile below ”your plan” and then click on ”change plan” to buy a basic, advanced or maximum plan.